


Table of contents
Prologue - The hardware
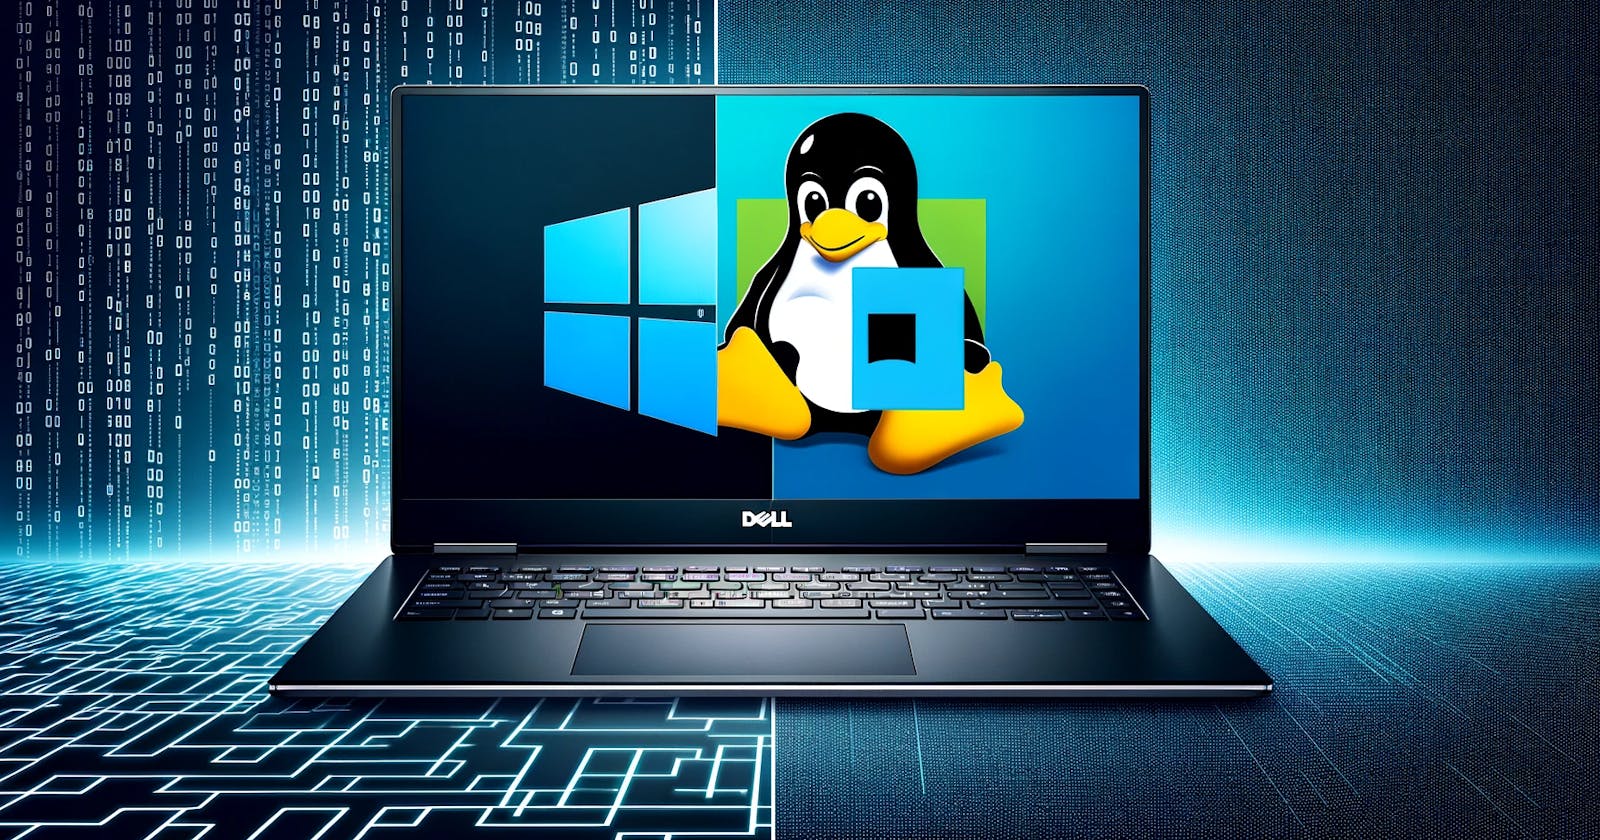
I got a new laptop and switched back to Windows/Linux after being a macOS fanboy for five years.
I got my daily driver back in 2016, a MacBook Pro (Retina, 13-inch, Early 2015). It's my primary computer. I have never turned it off except when not on a flight. It's a well-engineered, faithful device. It has been my muse, and I use it for everything.
Five years later, the MacBook Pro is outdated with the changing times.
The Chrome tab gods hog the paltry 8GB memory and render all other applications useless. The dual-core Intel Core i5 hits ~85-90% usage, and the CPUs run at a zillion degrees on Google Meet calls.
The device is still suitable for light browsing, office work, and entertainment. It simply doesn't cut my developer needs anymore.
It has aged but served me well.
The new 2020 edition Dell XPS 9500 - 15-inch.
Here is the XPS 15-inch alongside my MacBook Pro 13-inch.
Boy, this is a gorgeous machine.
I do not game much on PC, but the "4GB NVIDIA GeForce GTX 1650Ti" for graphics is excellent for those Steam gaming sessions. The "10th Gen 6 Core Intel i7" processor will turbo up to 5.0Ghz, alongside the 32GB of memory.
The screen is five hundred nits (bright, very bright), 4K, and a ten-point multitouch. The trackpad is exceptionally smooth, and the keyboard is godsent to weary fingers.
The Apple MacBook Pro (16-inch, 2019) vs Dell XPS 9500 (15-inch, 2020) debate. Why one over the other?
I had a few compelling reasons:
The screen, a huge trackpad, and the buttery smooth keyboard on the XPS 15-inch beats the MacBook Pro 16-inch.
At ₹2,25,000 (~US$ 3000), the XPS 15-inch is a steal compared to the MacBook Pro 16-inch, which costs a whopping ₹3,15,000 (~US$ 4300) for a similar if not identical config as the XPS 15-inch.
Finally, I can upgrade the memory and the disk and add one more M.2 disk at will. Everyone knows how painful and expensive upgrades are on any Apple device.
At the time of this post, the stores here in India only have a 16GB memory variant of the MacBook Pro 16-inch. While you can get it configured to a higher tier, you must wait for 6-8 weeks. It's not worth the hype.
Here are some links (affiliate): XPS 15-inch: amzn.to/2FatDNk, MacBook Pro 16-inch: amzn.to/3bzf1mT, if you are looking to buy one of these.
Why dual boot with Linux?
For all its physical beauty, the XPS 15-inch ships with Windows 10.
I have been a macOS fan for five years now. I have used it daily and built up muscle memory. Breaking up and moving to Windows will take some getting used to.
A Unix-like environment is quite essential for my developer's needs.
Sure, I can use WSL to run Ubuntu on Windows, but my distro of choice, Pop!_OS 20.04, is unavailable with native support for WSL. It's just too much work to set up with WSL during this write-up.
Dual boot is more straightforward and makes sense to me.
Pop!_OS is just blatantly awesome. It's based on Ubuntu goodness with red, white, and blue sprinkles.
I prefer the Debian/Ubuntu ecosystem, and we use Ubuntu as the host OS on our servers at work. Pop!_OS comes as a natural choice for me.
Preparing for the Installation.
Depending on what you want to do with your setup, your steps will be slightly different from mine. Generally, you will need the ISO and a removable drive for the installation media. A pair for each OS you want in the multi-boot setup. For installing everything from scratch, here are the broad steps:
Update BIOS settings as applicable.
Format and partition the disks while installing Windows / Linux.
Install Windows.
Install a Linux distro.
Preparing the installation media.
I used Balena Etcher to create my installation media. It's pretty neat; you select the pre-downloaded ISO and the removable drive, and you are done.
Another popular option (Windows only) is Rufus.
Preparing Boot Disk.
Go to Windows Explorer --> Right-click on C: (OS Drive) --> Select Manage BitLocker --> Turn Off BitLocker.
This step is *required* because, later, we would need to turn off secure boot for Pop!_OS, and entering a 48-digit key every time you want to boot into Windows is not ideal for me.
You can skip this if you intend to do a clean installation. I preferred keeping my stock Windows 10 as is. So, all I needed was to get some space freed up for the Pop!_OS installation.
Open Windows Search (
Win ⊞+S) and enter "Create and Format Hard Disk Partitions" to open Disk Management.Select a drive, right-click --> Shrink Volume...
I chose to shrink the only drive I had in my case, the 1TB OS disk, by 200 GB. The interface is in MB, so I typed
204800and was good to go.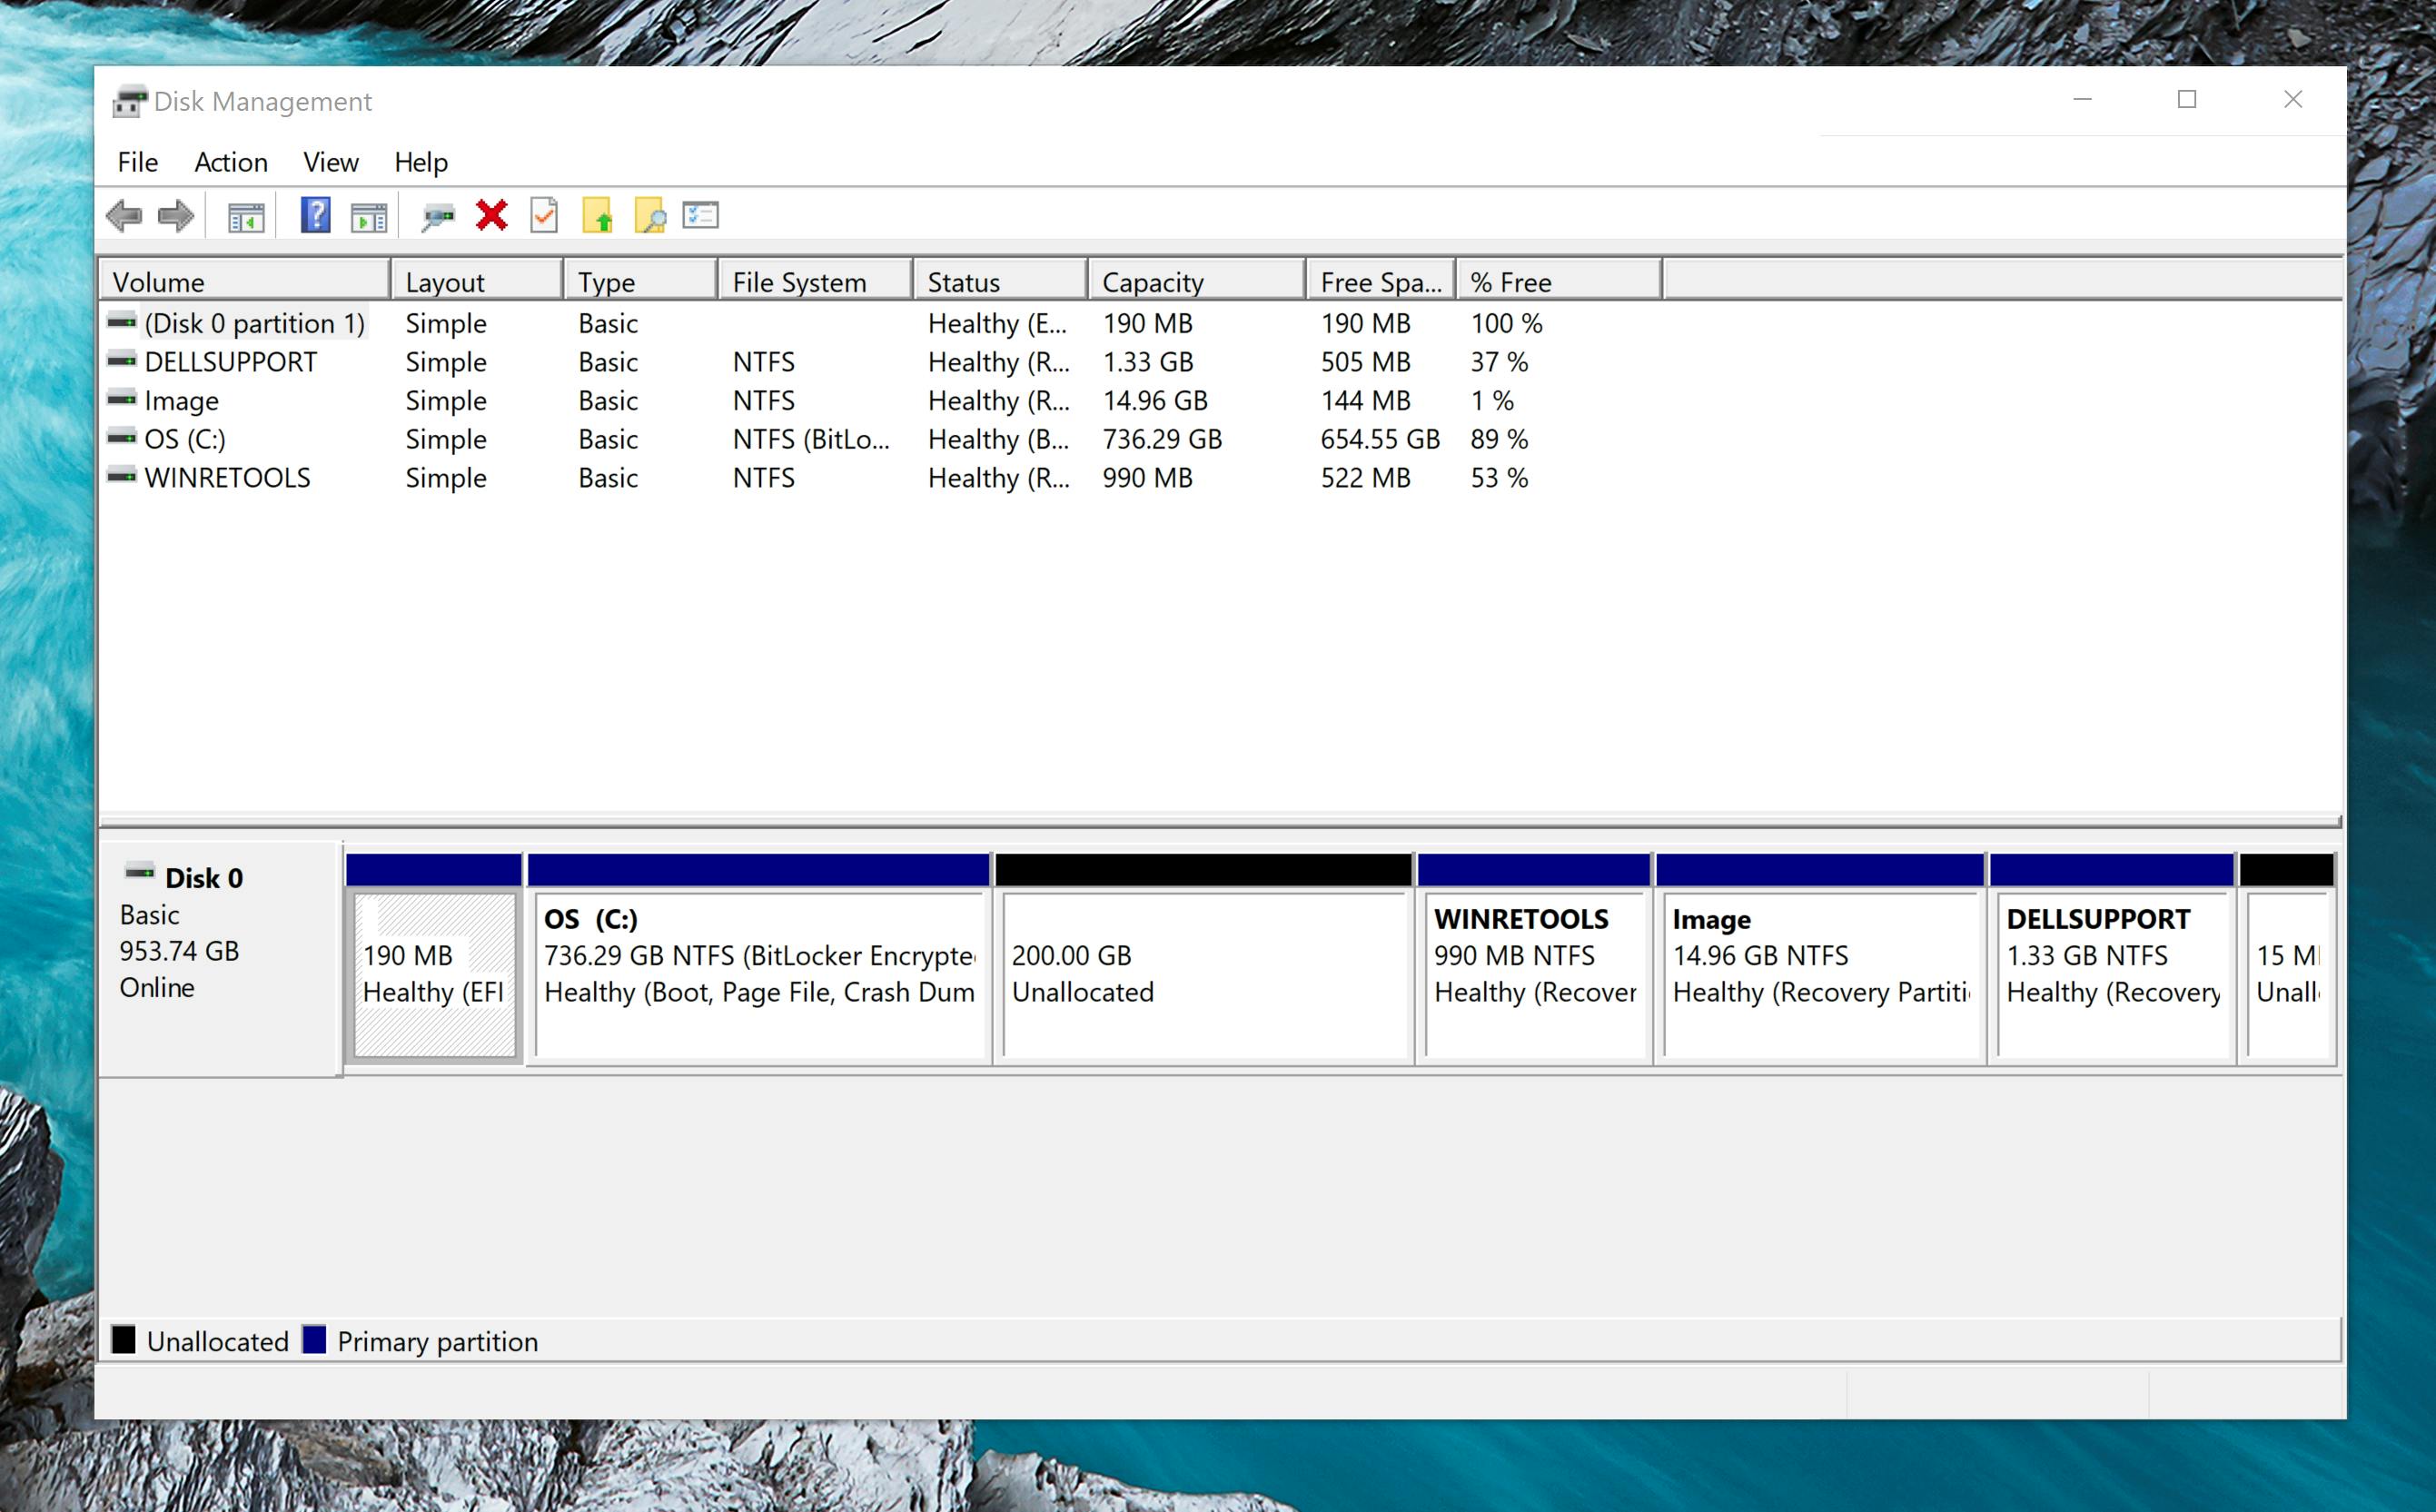
Restart/Shutdown.
BIOS Settings for Storage Controller and Boot Options.
The XPS lineup has RAID drivers installed for the SATA Controller, which Intel recommends. We need to switch to AHCI drivers for our dual boot setup.
Additionally, Pop!_OS does not have support for secure boot and needs it to be disabled in the BIOS.
As a result, you need to change these BIOS settings for the installation:
The storage controller should be in AHCI mode.
"Secure boot" must be disabled.
To address pitfalls, I came across this superuser answer, which seemed to have worked for others.
Open Windows Search (
Win ⊞+S) and enter "Command Prompt". Select Run as administrator in the results.Add an entry to start Windows in Safe Mode (on the next boot).
bcdedit /set {current} safeboot minimalTap the
F2button a few times when the device is booting. The system would enter the BIOS.Go to Storage --> SATA Operation and select AHCI.
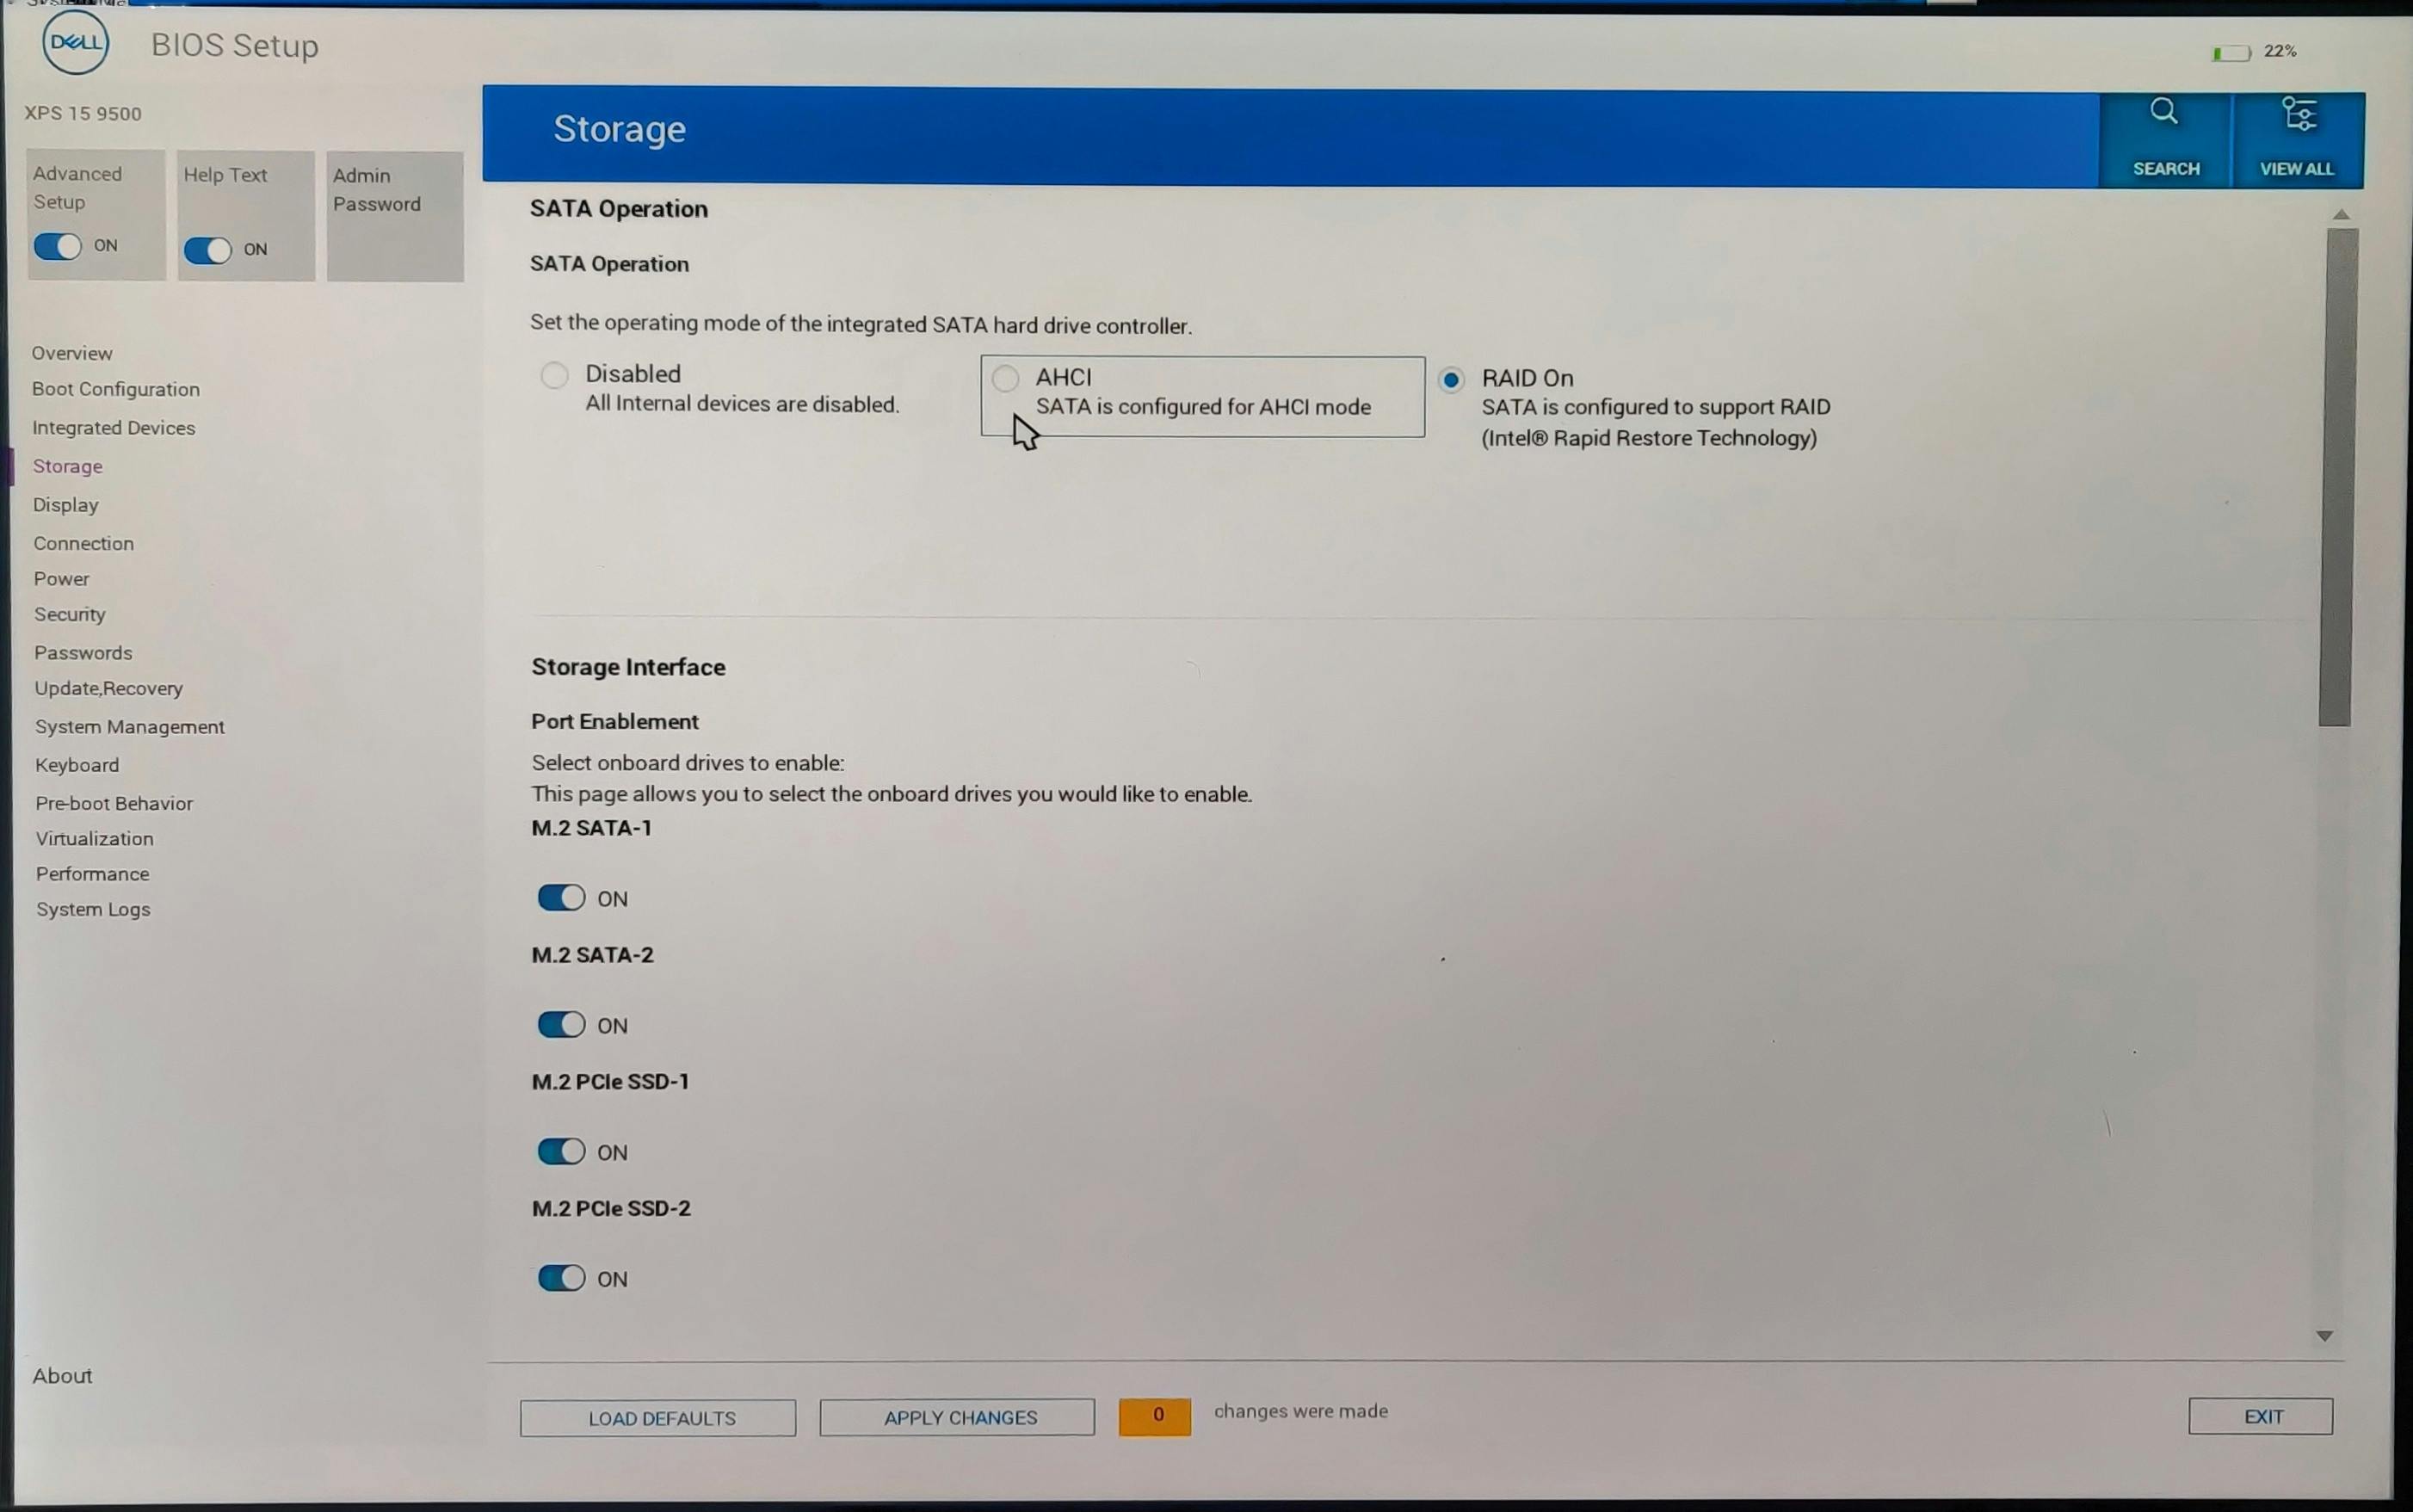
If you get a warning, proceed by selecting Yes.
Go to Boot Options --> Secure Boot --> Enable Secure Boot and select OFF.
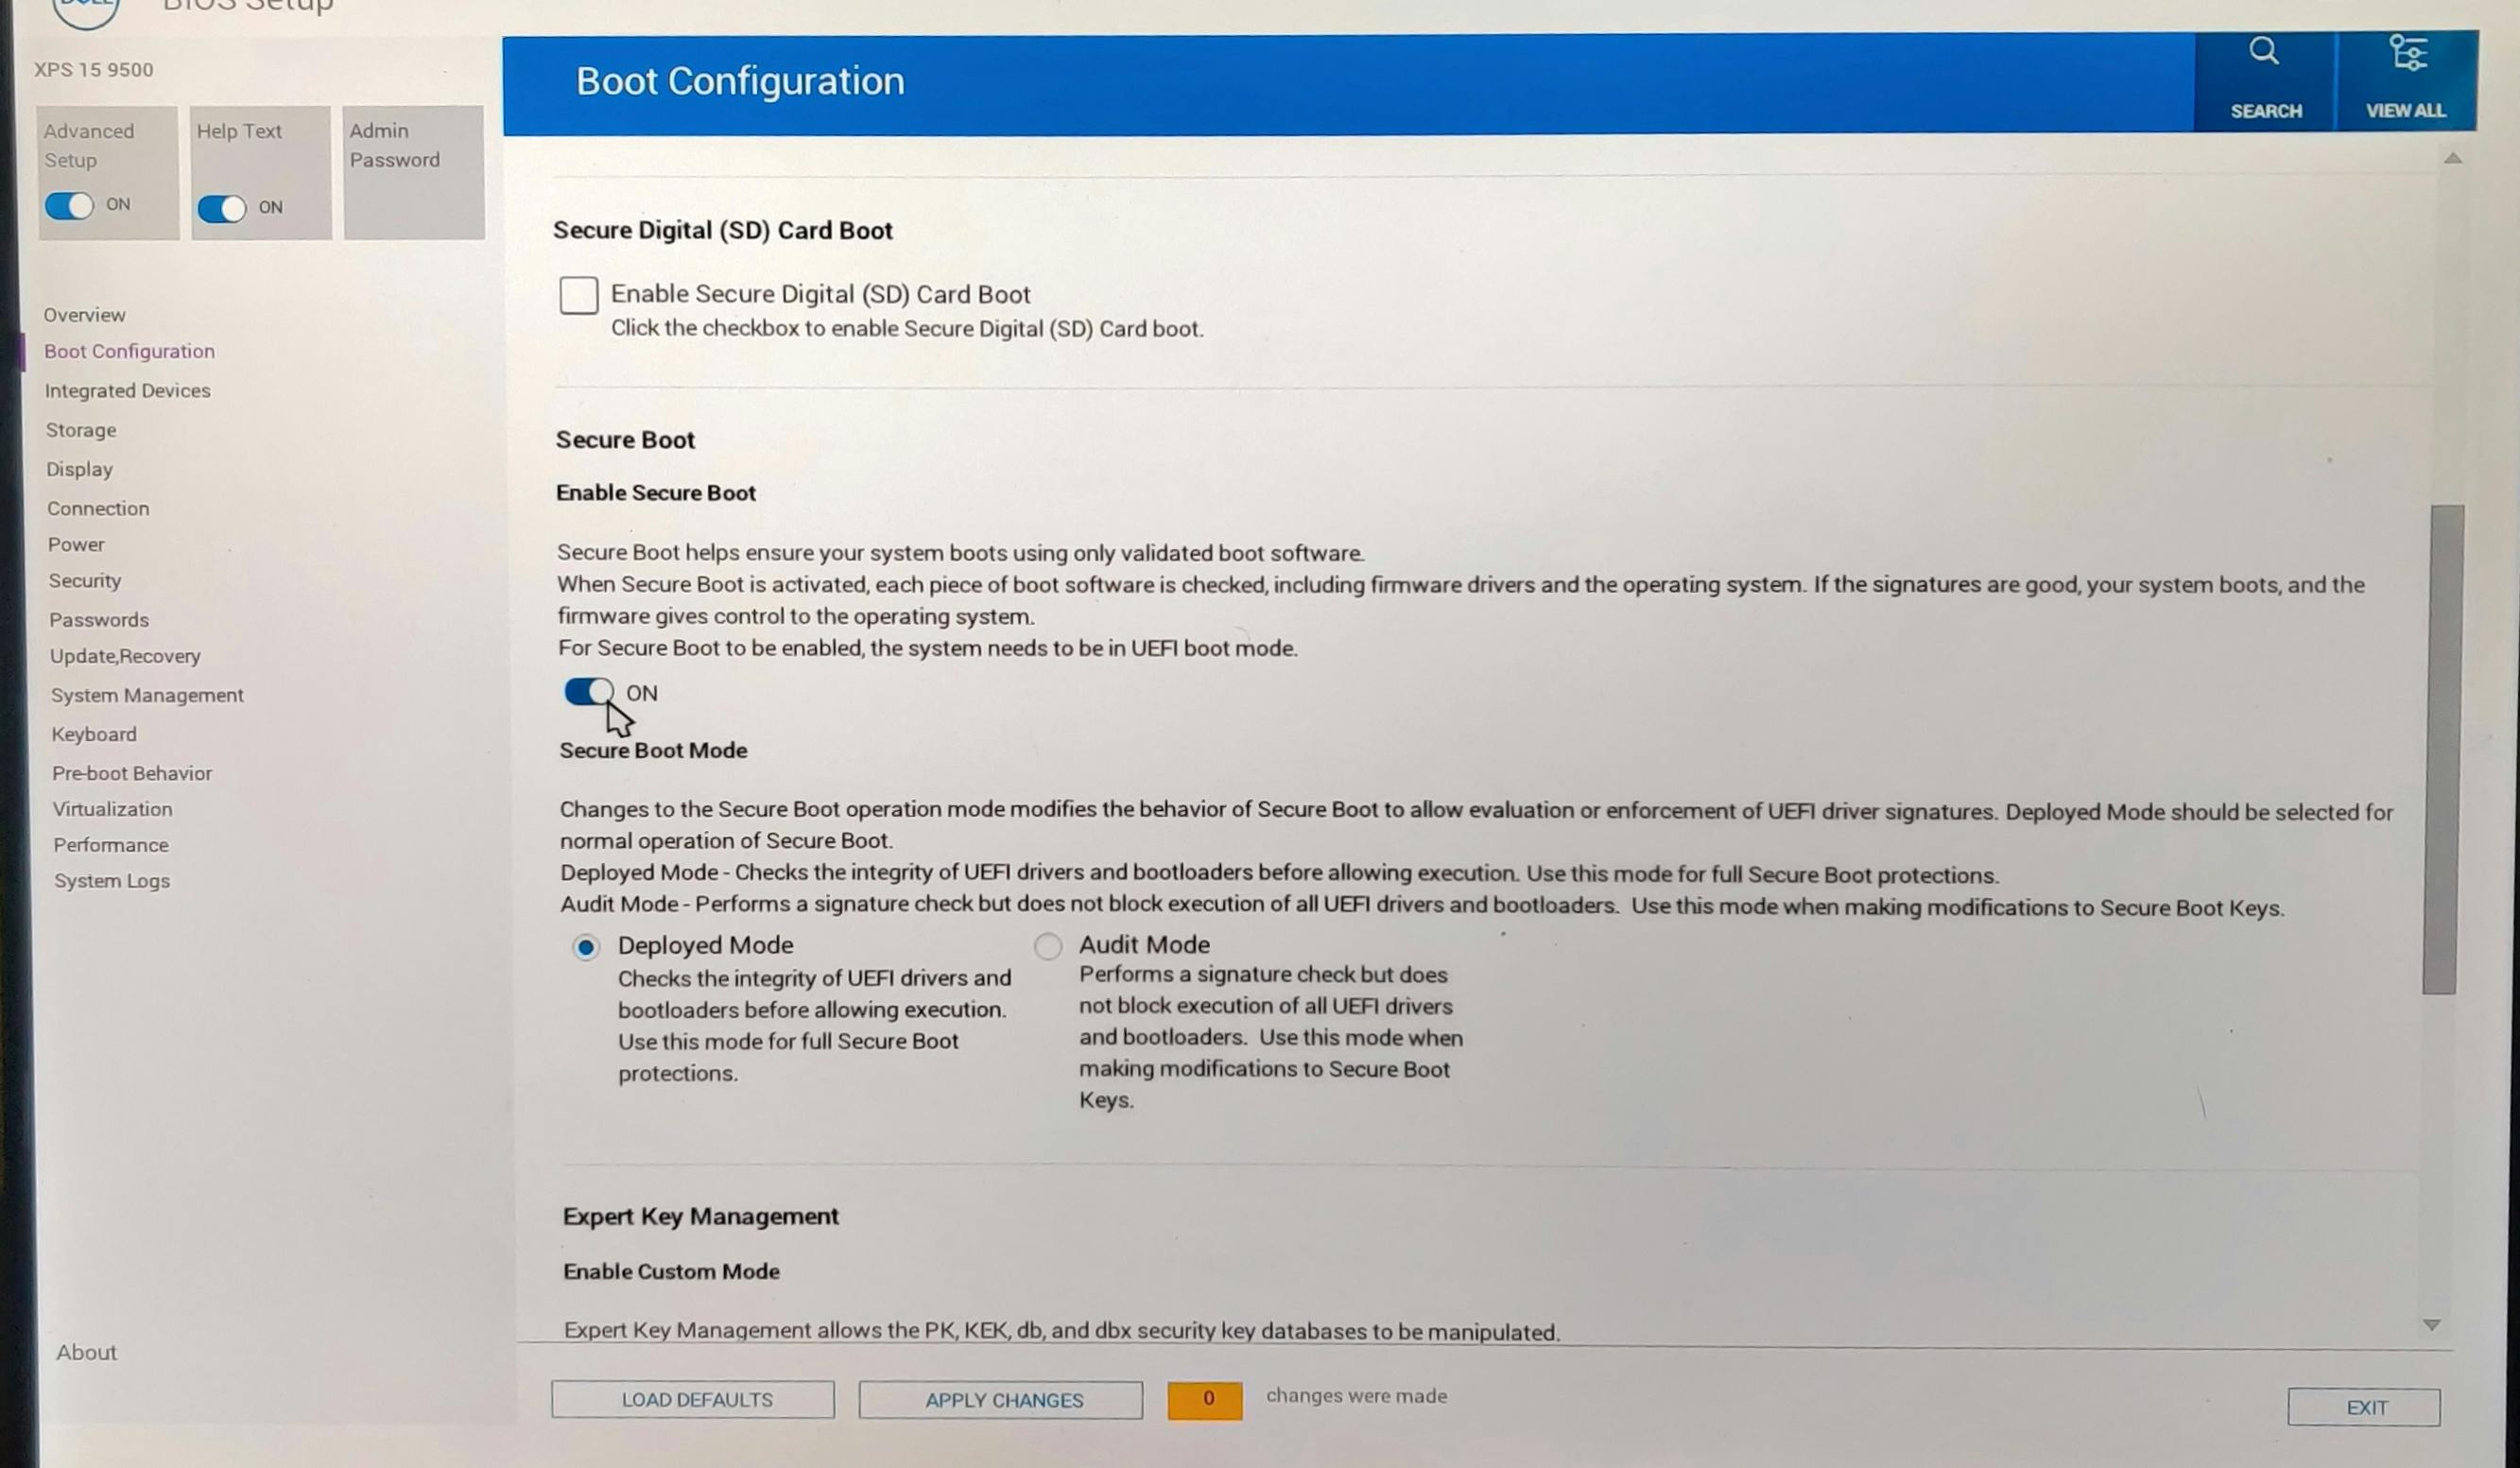
If you get a warning, proceed by selecting Yes.
Click Apply Changes at the bottom of the screen --> Click OK. You can then click Exit.
The system will boot into safe mode (because of Step 2). The drivers for AHCI mode will set up automatically, and we can proceed to reset Windows to start normally next time.
bcdedit /deletevalue {current} safebootOnce the system boots, proceed to install Pop!_OS.
Installation
Insert the installation media and restart the system.
Tap the F12 key a few times to enter one-time boot options and select the removable drive on the list.
Now that we are in the wizard, it's straight from here, but we may want to watch for the partition setup:
Follow the wizard to select language, region, keyboard layout, etc.
On the "Install" screen, select the Custom (Advanced) option because we want to dual boot.
Click the Modify Partitions button on the bottom left. This step will open the GParted (Partition tool) window.
You should see the "unallocated" volume we freed up earlier.
Create the partitions for
boot,root, andswapspace (optional).a. Right-click on the "unallocated" partition in the list --> Click New. Enter
512(in MB). We will use this for thebootpartition.b. Click the Resize button.
c. Next, on the menu bar, click the green check button (✔️) to apply these changes.
Repeat the above three steps, changing the values for the partition size for the
rootand theswapspace (if you want one) as needed.Close the GParted window.
Configure the
Bootpartition:Select the smaller ~512 MB partition we created and toggle the Use partition button to ON.
Toggle the Format option to ON, and in the Use as option, select boot.
Leave everything else to default.
Configure the
Rootpartition:Select the largest of the partitions we created and toggle the Use partition button to ON.
Toggle the Format option to ON, and in the Use as option, select Root.
Leave everything else to default.
Click the red Erase and Install. It should take a few minutes to install the OS.
Once the installation is complete, you will be prompted to restart and set up the user account.
Next Steps
Update the OS and packages.
You can either use the GUI for updates (watch for the notifications) or use the commands like so:
Open a Terminal window.
Update and upgrade packages.
 sudo apt update
 sudo apt upgrade
Cleanup packages.
 sudo apt autoclean
 sudo apt autoremove
Drivers and UI extensions.
Most drivers work out of the box in Pop!_OS, including the bundled NVIDIA Graphics. Other than changing the display resolution and the trackpad direction to my liking, the system was good to go.
With Pop!_OS (and Ubuntu), you get the widely used GNOME desktop environment. There are several choices for extensions that you can add to your liking.
For instance, the Dash to Dock extension brings the familiar feel of macOS dock with cool customizations.
Configuring the boot order.
The boot config in BIOS (F2 --> Boot Configuration --> Boot Sequence) determines the disk that is treated as a boot device on system startup.
Because I will be using Pop!_OS more than Windows, it made sense to keep the Pop!_OS entry as the option on the top.
However, at the minute, getting into Windows requires getting the one-time boot options (press F12 at startup) and selecting the correct drive.
We can make this nicer by configuring the boot manager. A boot manager gives you an OS selection screen on system startup.
The Windows and the Pop!_OS have default boot managers that ship with them. Depending on whichever disk you prioritize in the Boot Sequence, you can add an entry to the "Windows Boot Manager" or "GRUB" boot manager on Pop!_OS.
I prefer a third-party boot manager called rEFInd.
It is a graphical boot manager for EFI and UEFI systems. rEFInd is quite famous for multi-boot configurations. It has nifty features like pretty themes for the splash screens, automatic timed boot selection, etc.
Install rEFInd using its official package archive:
sudo apt-add-repository ppa:rodsmith/refind
sudo apt  update
sudo apt  install refind
The default options presented by the installer work the best.
Themes, fonts, and hiding entries:
The default theme for rEFInd is not entirely pretty. But, it supports a wide selection of themes made by the community.
I am using the rEFInd theme Regular, which is simple, has a dark mode, and, best of all, has a neat install script.
Because I have a 4K display, I selected the icon's largest sizes (512px-192px). After executing the script, I also updated the font size to the large 46px like so:
Open a Terminal window.
Switch to root/superuser account.
sudo suUpdate the font size and family; I am using the
nimbus-mono-46.pngnano /boot/efi/EFI/refind/refind-theme-regular/theme.confGo to the bottom and edit the line for the font.
The
timeoutfor an automatic boot of the default OS is 20 seconds. It was a tad long for me; I set it to 5 seconds instead.The
timeoutcan be changed in the rEFInd config:nano /boot/efi/EFI/refind/refind.confIt should be there a few lines from the top of the file.
Finally, I needed to hide all the extraneous entries on the boot. This step is straight and a fantastic feature of rEFInd.
Reboot to the rEFInd splash screen on startup.
Navigate using the arrow keys and highlight any entry you want to hide.
Hit
Delete. Select Yes on the next screen.
I deleted some entries like the 512 MB boot entry and others. With that, the installation was complete. You can bring the hidden entries back on the splash screen using the Manage Hidden Tags Menu.
Epilogue.
Setting up my machine and writing this post while I was there was a well-spent lazy Sunday afternoon.
I did not realize how well Homebrew on Linux (formerly Linuxbrew) has matured. So, I proceeded further and set up my developer environment from my dotfiles. I am still working on a few tweaks for the Linux setup, for instance, exploring excellent GNOME extensions.
The hardest part of the last few hours is ditching the applications I have used on macOS.
I hope you liked this long post, and if you did or have any feedback, give me a shoutout on Twitter. While you are there, please give me a follow.
Stay safe and stay home. We got this.