How to reject recruiter emails with a custom no-reply email address?
This article explains how to set up a custom "no-reply" email address and reject emails harvested from GitHub.
The spammer's curse
I understand how frustrating it is to get spam emails from recruiters and others who harvest email addresses from GitHub.
GitHub displays the Git Author email address on every commit if the repository is public.
However, it's worth mentioning that this behavior results from Git's design, which was influenced by Linus Torvalds' preference for sending code patches over email rather than using other VCS. As a result, Git has become an extension of this workflow.
Decades later, it works the same way.
GitHub's escape hatch
GitHub does have a way to obfuscate your email by using a special email address like "1884376+raisedadead@users.noreply.github.com"

Any emails sent to the address will bounce. Neat.
You can also set the email address as your Git Author email address:
git config --global user.email "1884376+raisedadead@users.noreply.github.com"
Then, when you commit, Git will use this email address. It looks something like so in Git logs:

A meaner approach
Or, if you are like me, you can do something spicier like this:
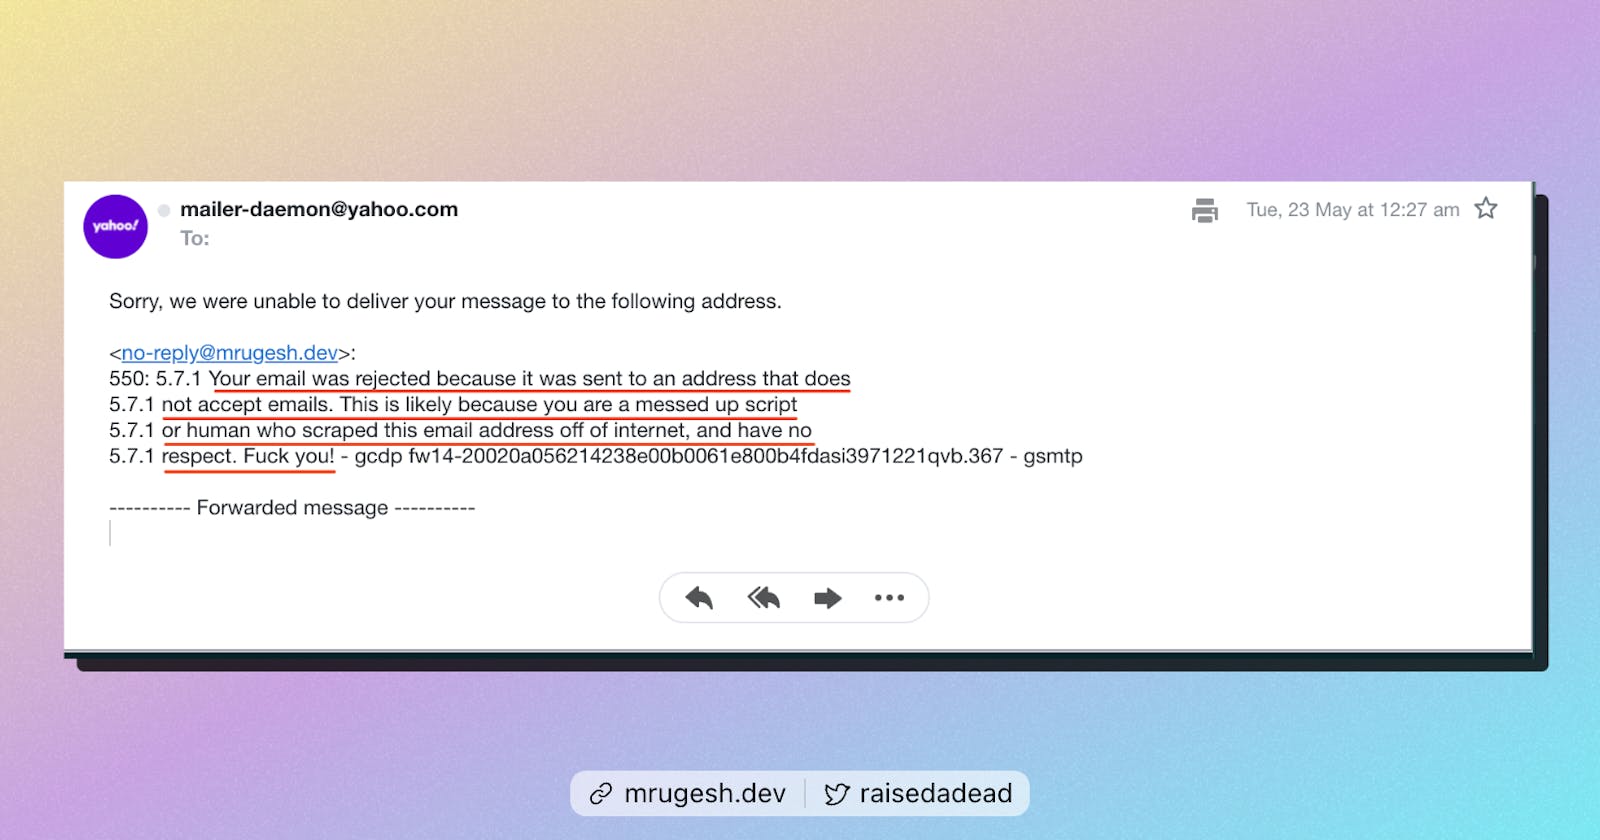
Anytime someone emails my "no-reply" email address, they are greeted with a polite:
Your email was rejected because it was sent to an address that does not accept emails. This is likey because you are a messed up script or human who scraped this email address off of internet, and have no respect. F*** You!
Interested in setting this up? Here you go:
You will need a custom domain.
You will also need a Google Workspace account.
You can get similar results with Cloudflare's Email routing and Email workers if you do not have Google Workspace.
Using Google Workspace
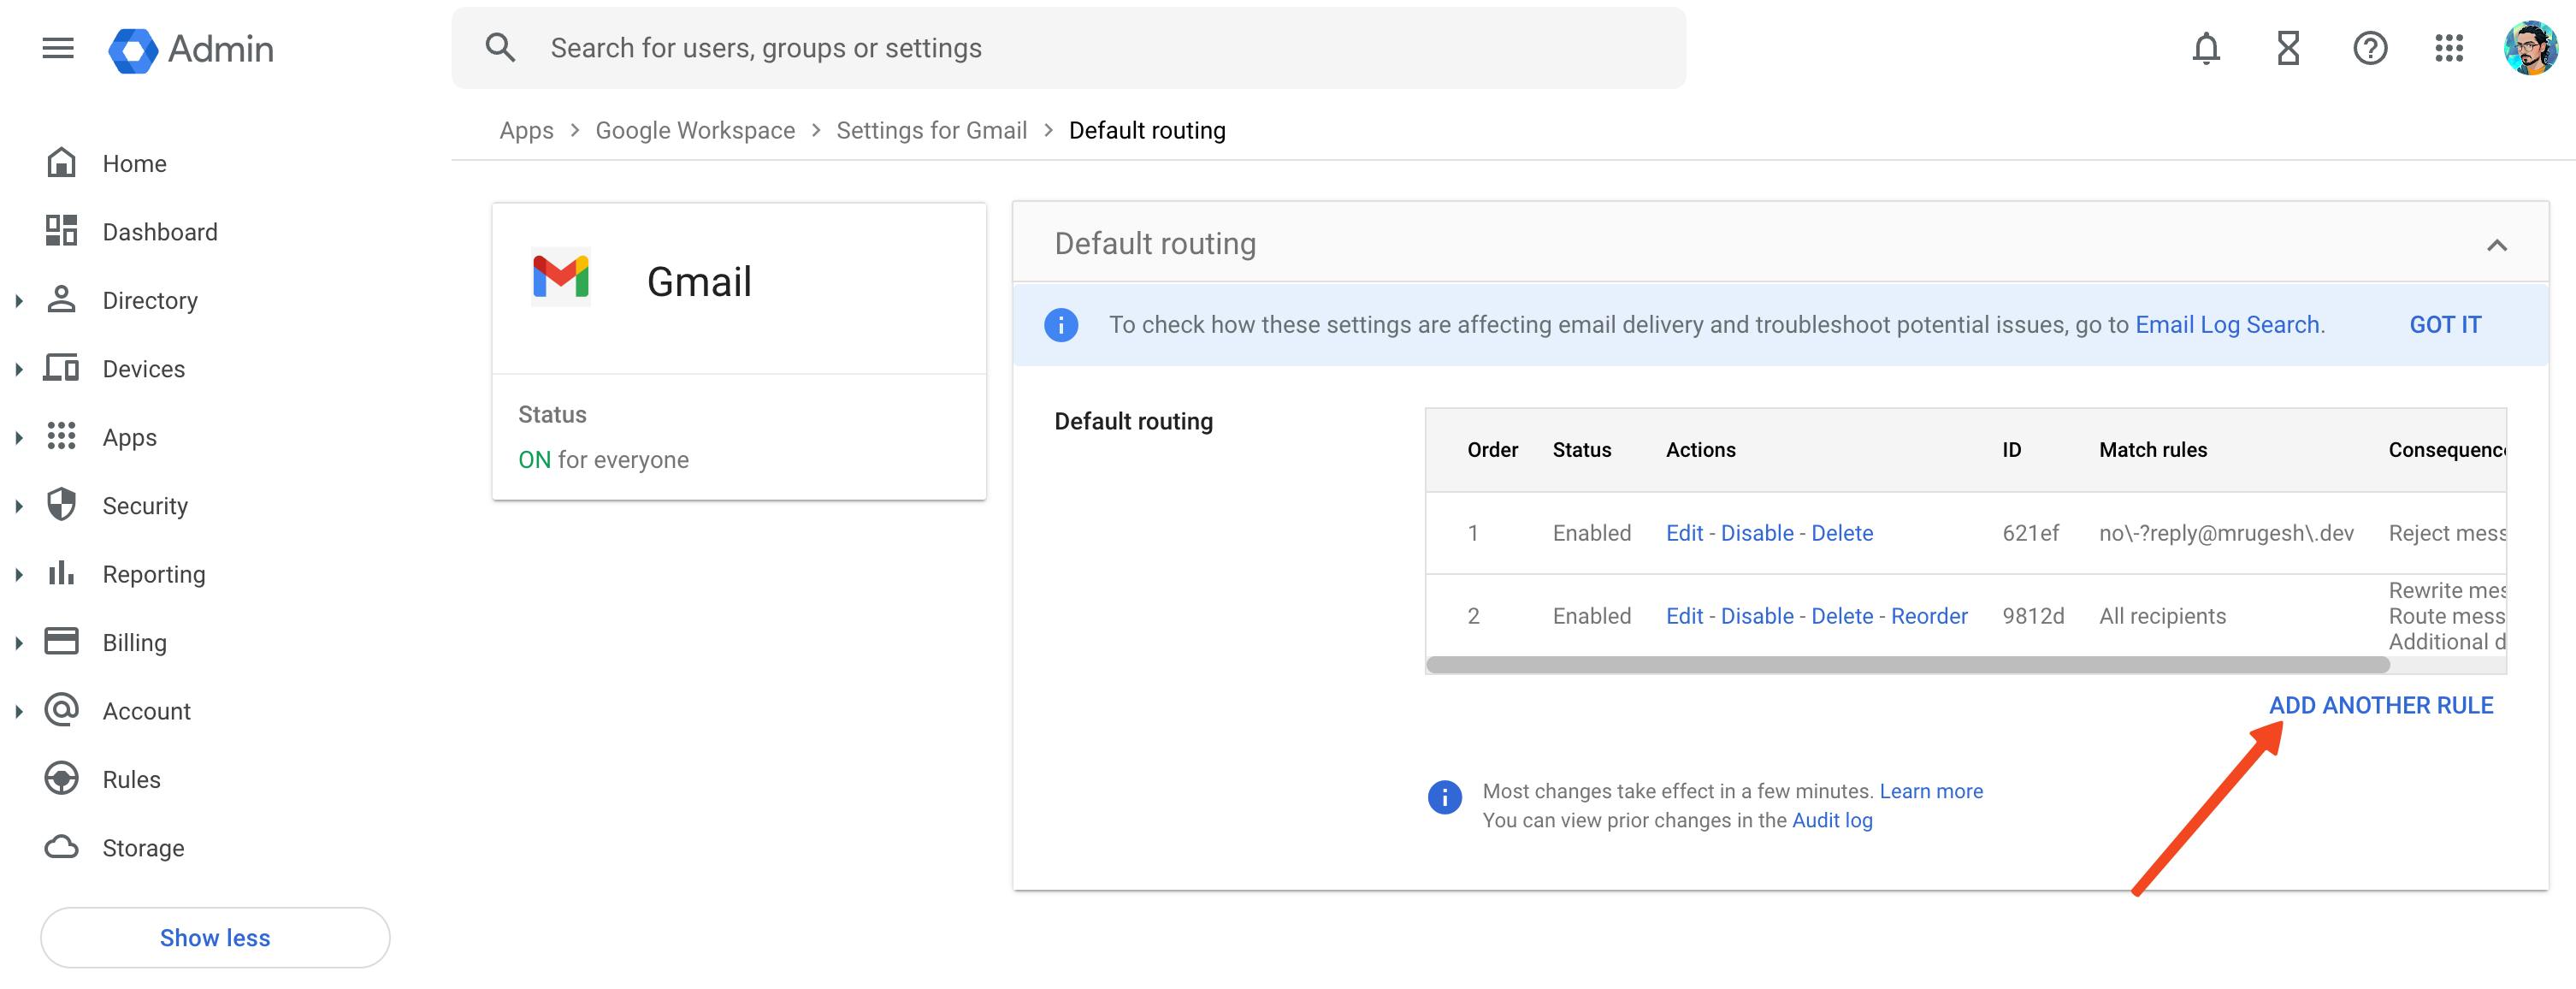
Visit the email routing page in the Google Workspace dashboard. Here is a quick link: https://admin.google.com/ac/apps/gmail/defaultrouting
If you do not have any rules, click the "Configure" button.

If you do have other rules, click "Add another rule"

Be careful not to use an email address you plan to use when specifying envelope recipients. You may miss out on important emails.
Once you are ready, Select the
single addressoption from the drop-down in theSpecify envelope recipients to matchfield add an email address likenoreply@example.comwhere example.com is your domain name.You can also select the pattern match and regex matching. Again be careful, or else you may end up with unwanted routing results.
Next, on the
If the envelope recipient matches the above, do the followingoption, selectReject messageand a text like the one below:We're sorry, but your email was rejected because the address you sent it to doesn't accept emails. This may be because the address was obtained by an automated script or by scraping the internet, which is not respectful.
Of course, make it colorful if you want to.
Leave everything else the default and click "Save". You are done!
When someone sends you an email to that address, it gets rejected (also known as a bounce) with your custom message.
Using Cloudflare Email Routing and Cloudflare Workers
But what if you do not have Google Workspace? You can use Cloudflare if your domain already uses Cloudflare's services.
Ensure you have onboarded your domain to Cloudflare and enabled "Email routing" and "Email Workers" for your domain, including updating the DNS records.
Here is more information: https://developers.cloudflare.com/email-routing
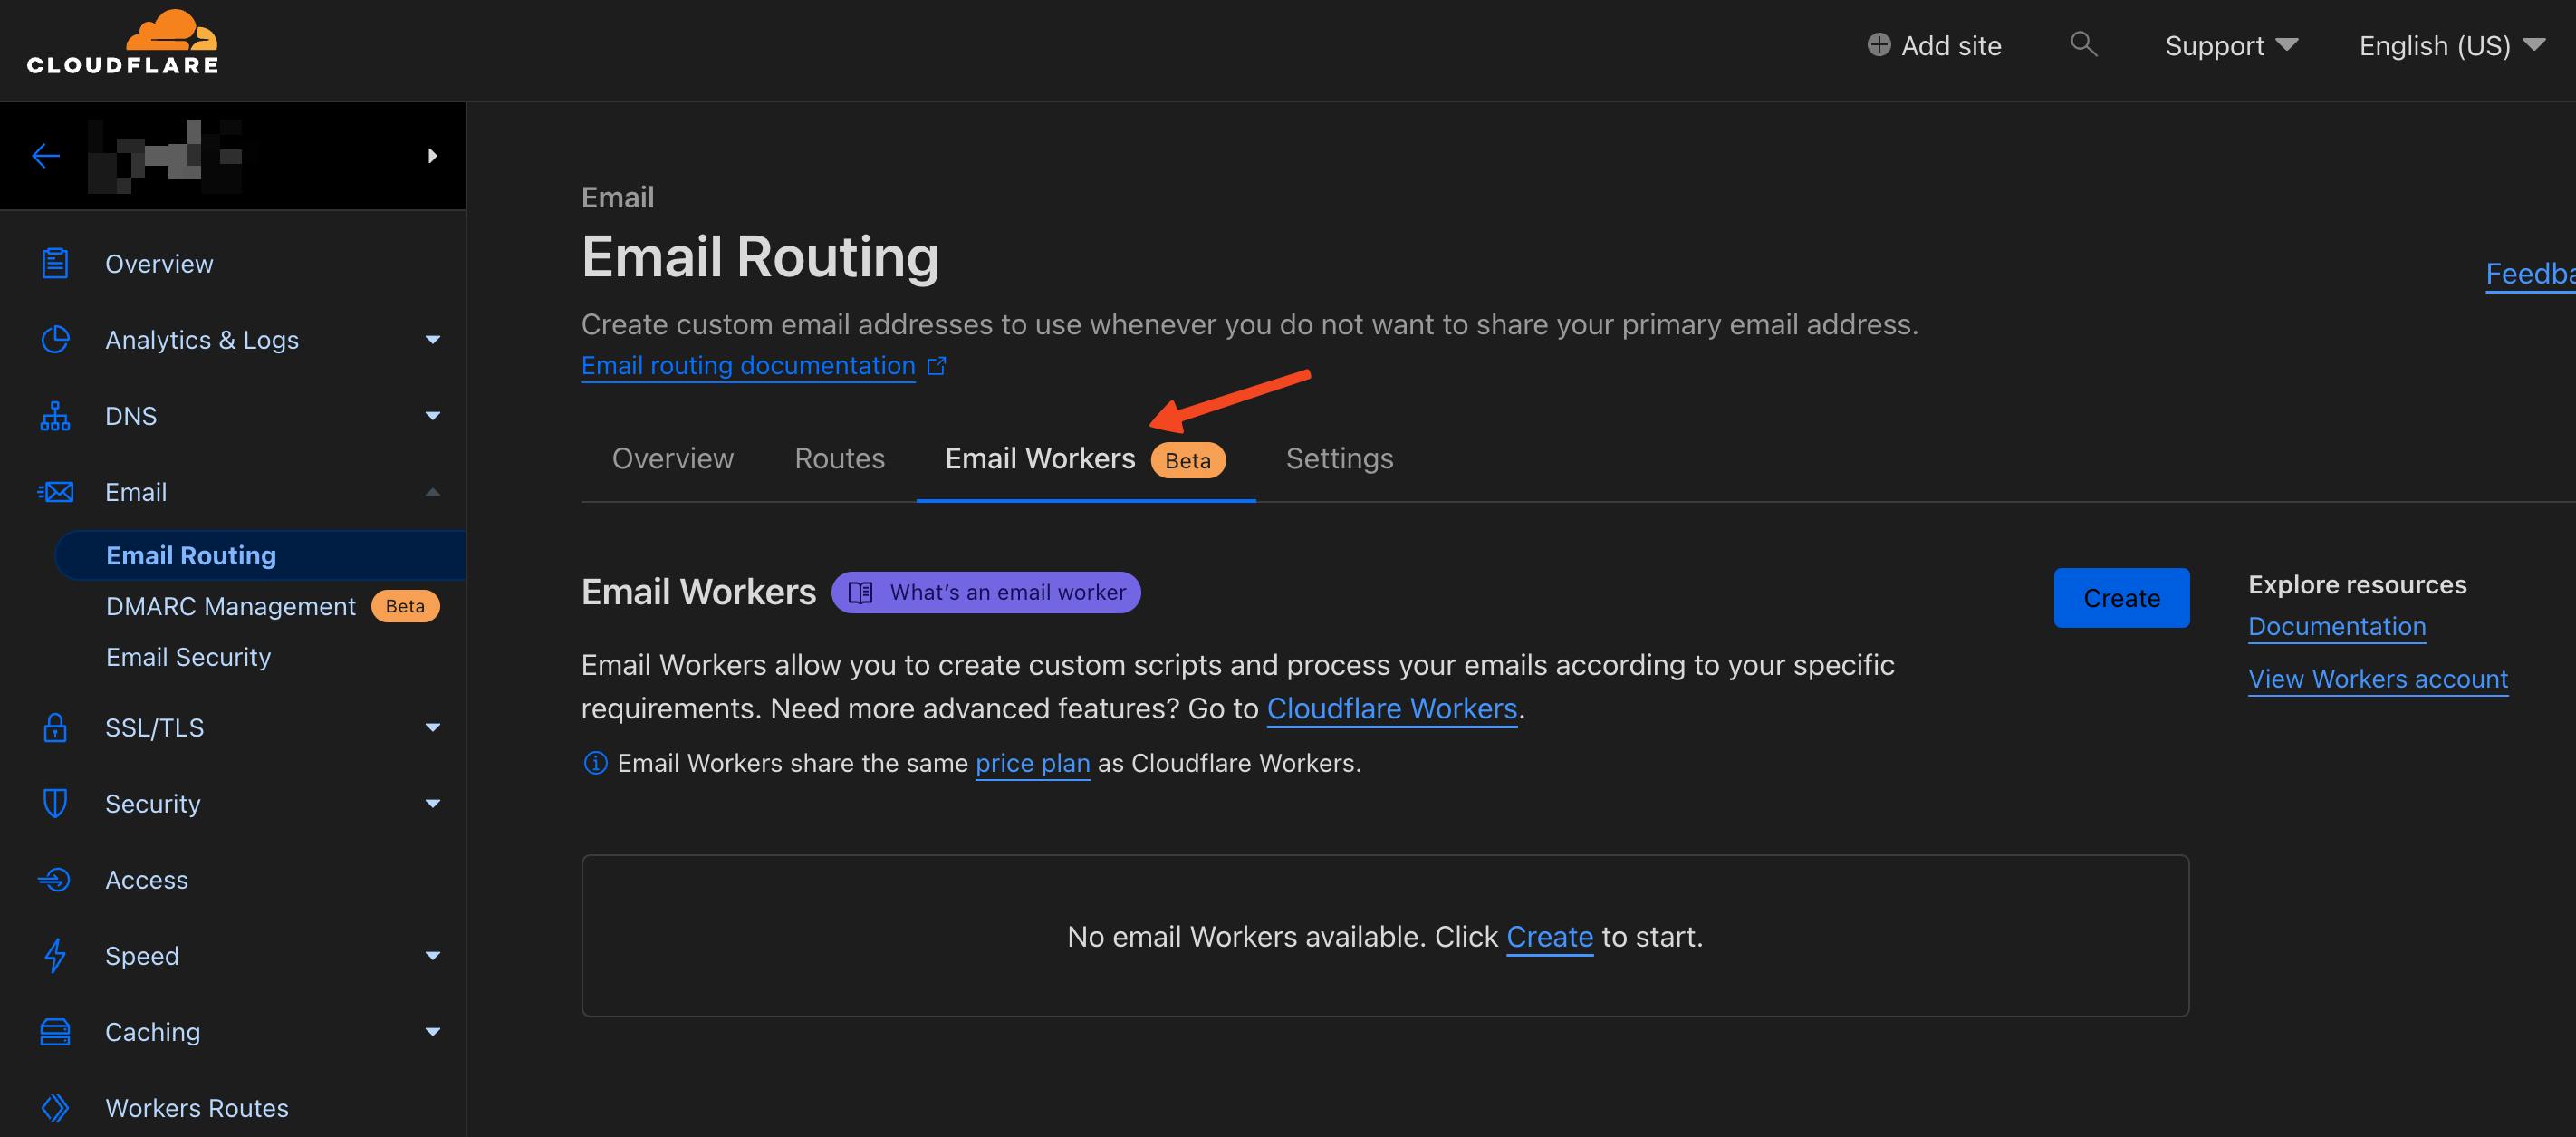
Next, visit the "Domain > Emails > Email Routing" on the sidebar and Go to the "Email Workers" tab.

Click "Create".
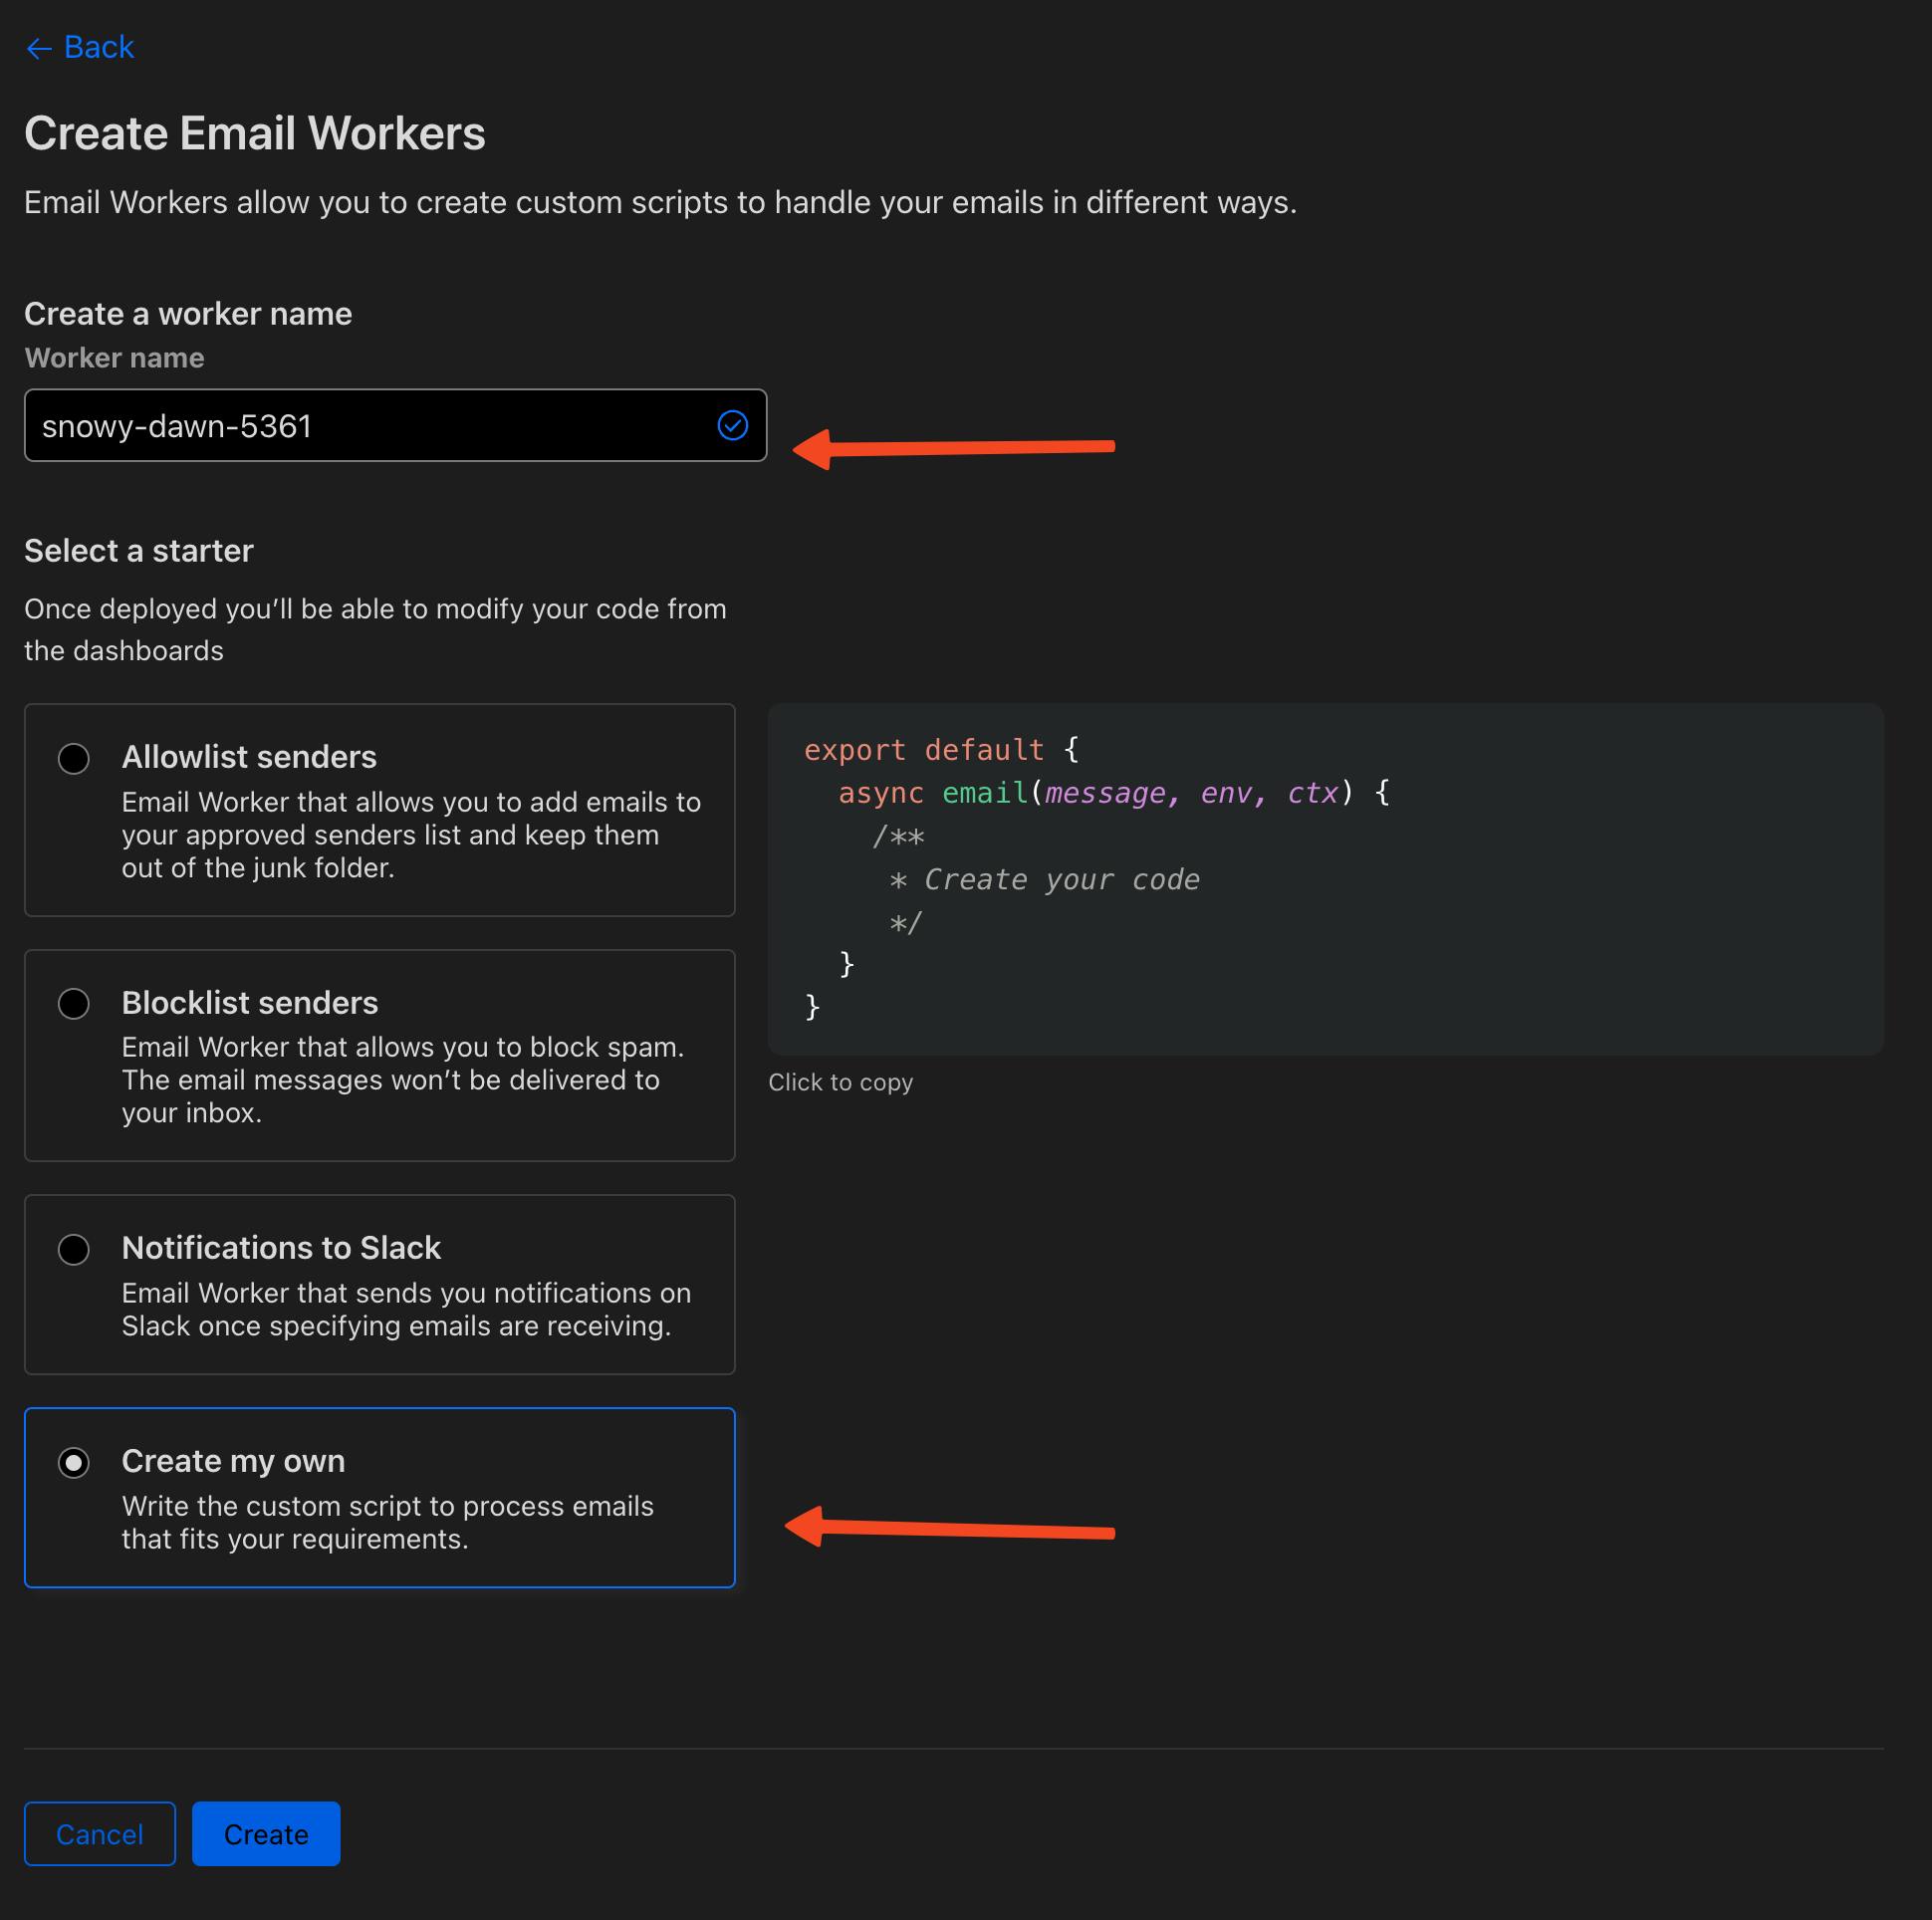
On the next page, give your worker a name (or use the autogenerated name) and select "Create my own":

We will add the code in the next step once Cloudflare provisions the worker.
Add the code:
 export default {
   async email(message, env, ctx) {
     message.setReject("My custom rejection notice");
   }
 }
You can use a message similar to the one in the Google Workspace method earlier.
Next, visit the Domain > Emails > Email Routing on the sidebar and Go to the "Routes" tab.
On the "routes" tab, click the "Create Address" button and add a desired address you do not want to use to receive any email, like
noreply@example.comwhere example.com is your domain name.Select the "action" as
Send to a workerand select the worker you created in steps 3 & 4.Click "Save" and mark the status of the rule as active by changing the toggle.
You are done! Now anytime you get an email, it will be rejected with the message by the worker.
Bam! Your busy self will thank you.
I hope you liked this story, until the next one.

