


Hello Hashnode 👋
Now that I am home, I decided to start writing again. I started thinking about what would be my first post on hashnode. I have heard so much about this fantastic platform.
Here is the story.
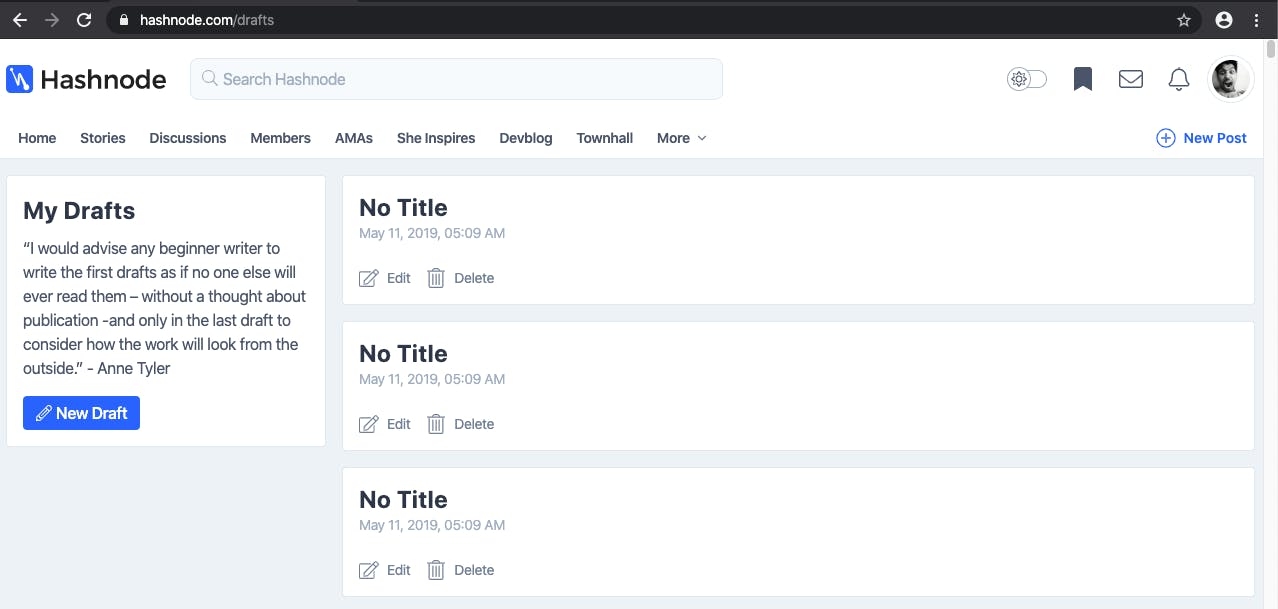
I was playing around with the settings of my new blog. There were tons of customizations on offer. And then, I happened to click on the "Unpublished Drafts."

I joined the platform when the Hashnode team launched it last year and started a publication. However, it had been dormant all this while, and what I discovered was a bit of a surprise.
I had a few drafts in there.
These drafts were interesting. I saw that each was from May 11, 2019, created roughly at the same time at 5:00 a.m. It had to be a mistake. Why would I have hundreds of drafts?
It took me a minute, but I realized there could have been a bug in the platform's early days. How else would I create so many topics?
I have an obsessive-compulsive disorder with messy inboxes and draft queues. I am pretty pretentious about "digital organization." I am that guy who likes the inbox to be zero at all times. I also enjoy taking the trash out in Gmail. But you don't need to read this, moving on.
So, I started deleting these empty drafts by hand—one by one.
Five deletions later, I got bored to death. So, I looked for a "select and delete" option. There wasn't one.
Who would think of adding such a feature? Is some random user trying to clean up their stash of empty drafts? No one is ever going to see this list!
I started counting the drafts.
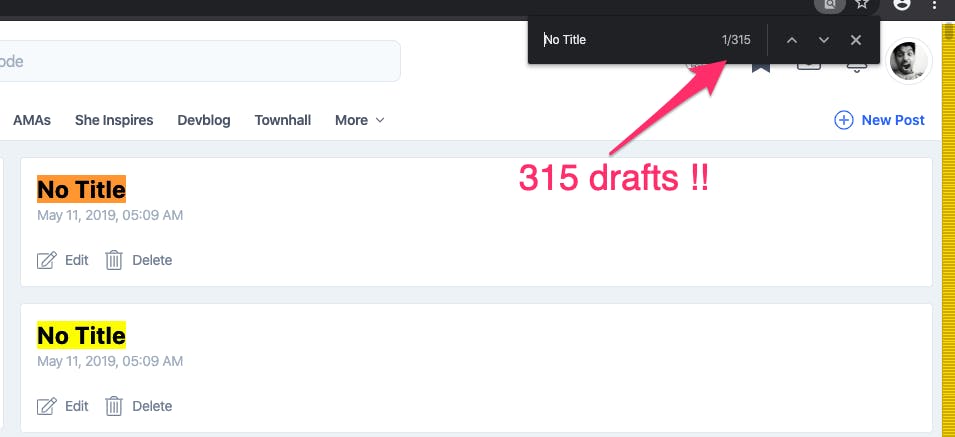
Boy, I had a lot of them to do by hand. My OCD would not let me overlook this.
No! I am not doing this by hand; I have better things to do than delete drafts at 10:00 p.m. on a Wednesday. I could be watching Netflix with my lovely wife. But my nerdy mind won't let me go away.
Heck, I am a developer. I should automate this; wouldn't that be fun?
So, my Puppeteer quest began.
So, what is Puppeeter.?
It is a Node.js library. It helps you interact with the Chrome and Chromium browsers. And it is a fantastic tool to have with you at all times. It is excellent for executing automated tasks that involve a browser.
Learn more about Puppeteer here: https://pptr.dev.
Now, you can choose to write all the code from scratch. But you can also cheat and use a browser extension to record a script.
That's right; it's exactly like a macro recorder.
All you do is record the steps, click a button, enter some text into an input, etc.; when done, the fun part begins. The extension will spit JavaScript that you can take and add to your Puppeteer script. More often than not, you are good to go.
We can start the recorder, delete one draft, and get this nifty script:
const puppeteer = require("puppeteer");
(async () => {
  const browser = await puppeteer.launch();
  const page = await browser.newPage();
  const navigationPromise = page.waitForNavigation();
  await page.goto("https://hashnode.com/drafts");
  await page.setViewport({ width: 1280, height: 934 });
  await page.waitForSelector(
    ".w-full > .post-card:nth-child(1) > .flex > .flex:nth-child(2) > span"
  );
  await page.click(
    ".w-full > .post-card:nth-child(1) > .flex > .flex:nth-child(2) > span"
  );
  await navigationPromise;
  await browser.close();
})();
Great right? Let's get to work then.
Let's start by making a list of the user stories:
We need to sign in.
We need to loop this repeatedly for however many empty articles we have.
We also need to handle the page navigation after each deletion.
We can now tweak the script that the extension has transcribed for us.
Puppeteer will launch a new instance of Chrome. We can write code to review the sign-in flow and navigate to the drafts page. We can then add the business logic for deleting the empty posts.
But the sign inflow is going to be a pain. We will be making a lot of trial and error while developing the final script. Also, it's not a part of the actual automation loop.
Note that our actions are:
Navigate the
/draftspage.Find and Click Delete.
Click OK on the Confirm dialog.
Wait for the page to (re)load and repeat all these steps once again, as needed.
Thanks to Puppeteer, we have a convenient way of "hooking" onto a pre-existing session. That is a browser instance with a session we have already signed in to. This way, we can skip the authentication. This approach only works because we are attempting the automation on our local machine as a real user.
Let's launch a browser with debugging enabled. The below command will expose a port and web socket that we will use later:
We can run this command on a terminal.
/Applications/Google\ Chrome.app/Contents/MacOS/Google\ Chrome --remote-debugging-port=9222 --no-first-run --no-default-browser-check --user-data-dir=$(mktemp -d -t 'chrome-remote_data_dir')
I borrowed the command above from this article for macOS; you should check the article for tips on your OS.
Now, we can sign in to https://hashnode.com on our launched Chrome instance. We will re-use the session by connecting to this instance from Puppeteer like so:
const browser = await puppeteer.connect({
  browserWSEndpoint:
    "ws://127.0.0.1:9222/devtools/browser/c52e0020-15e2-4c09-85ab-68a750f96338",
});

const page = await browser.newPage();

let pageUrl = "https://hashnode.com/drafts";

await page.goto(pageUrl, {
  waitUntil: "networkidle0",
});

await page.setViewport({ width: 960, height: 934 });
Excellent, so far, so good. We confirm that we do not get any prompts to sign in and are on the page with a list of all the drafts. Onward then?
Let's see if we can count the drafts.
Let's update the script the recorder created and garb the necessary selectors. Cleaning it up, we have:
let deleteButtonParentSelector = ".post-card";
let deleteButtonSelector =
  ".w-full > .post-card:nth-child(1) > .flex > .flex:nth-child(2) > span";

let count = await page
  .waitForSelector(deleteButtonParentSelector)
  .then(async () => {
    return (await page.$$(deleteButtonParentSelector)).length;
  });

console.log("found " + count + " drafts");
Now, please note we are using a slightly fragile logic for counting the posts given the facts: We know all the posts on this page are "drafts" (and want to delete them). We also know that all the posts are right here on this page, i.e., there is no additional pagination. Considering these assumptions, you may want to adjust your selector strategy.
Great, moving forward, let's try and delete one of the posts. Using the recorder's script again, here is what I came up with:
page
  .waitForSelector(deleteButtonSelector)
  .then(page.click(deleteButtonSelector));
Except. It did not work; what a bummer.
Ah - there is no handling for the confirmation box? Darn you, recorder. You did not capture that confirmation/alert dialog.
That should be an easy fix. We can hook into the dialog handler provided by Puppeteer.
page.on("dialog", async (dialog) => {
  await dialog.accept();
});
OK, this is getting us somewhere; let's throw it all together, shall we?
Here is the entire script.
//  #!/usr/bin/env node

const puppeteer = require('puppeteer');

// a promise-ified delay helper
const delay = ms => new Promise(resolve => setTimeout(resolve, ms));

const main = async () => {
  // 1. Connect to an existing browser instance
  const browser = await puppeteer.connect({
    browserWSEndpoint:
'ws://127.0.0.1:9222/devtools/browser/c52e0020-15e2-4c09-85ab-68a750f96338'
  });

  // 2. Open a new tab on, navigate and set a viewport
  // width and height
  const page = await browser.newPage();

  let pageUrl = 'https://hashnode.com/drafts';
  await page.goto(pageUrl, {
    //waiting for network requests is a good idea.
    waitUntil: 'networkidle0'
  });
  await page.setViewport({ width: 960, height: 934 });

  // 3. Add a handler for alert dialogs (we will use this later).
  page.on('dialog', async dialog => {
    await delay(100); // add a microscopic delay for the dialog to be ready.
    await dialog.accept();
    await delay(100);
  });

  // 4. Prepare selectors for elements that we will interact with
  let deleteButtonParentSelector = '.post-card';
  let deleteButtonSelector =
    '.w-full > .post-card:nth-child(1) > .flex > .flex:nth-child(2) > span';

  // 5. Count the no. of posts, we can use this number to loop and repeat things
  let count = await page
    .waitForSelector(deleteButtonParentSelector)
    .then(async () => {
      return (await page.$$(deleteButtonParentSelector)).length;
    });

  console.log('found ' + count + ' drafts');

  // 7. Loop over the no. of drafts we found.
  for (let index = 0; index < count; index++) {
    try {

      // 10. Promise.all to avoid race conditions between page loads and clicks
      await Promise.all([

        // 9. Waiting for the page load to complete before the next run
        page.waitForNavigation({
          waitUntil: 'networkidle0'
        }),

        // 8. Find and click the delete button.
        page
          .waitForSelector(deleteButtonSelector)
          .then(page.click(deleteButtonSelector))
          // The handler (No. 3 earlier) will be called here

      ]);

      // catch any errors for debugging later
    } catch (error) {
      console.log('error', error);
    }
  }

  console.log('done');
  await browser.close();
};

main();
And voila! Fifteen minutes later, We have deleted all those drafts.
This task is nothing short of a fool's errand, at the very least, but it helped me do a mundane job and helped me learn a trick.
I hope you enjoyed this post! Until the next one.
Stay safe and stay home. We got this.